












A Facebook lead is most likely to open your email in the first hour after they submit your form. If your email marketing runs on Mailchimp, the best way to catch that moment is to have every Facebook lead added to your Mailchimp audience automatically, tagged, so your welcome email goes out while they still remember your ad.
This guide shows how to connect Facebook lead ads to Mailchimp step by step, in about three minutes, with no CSV exports and no Zapier. Then it covers what most guides skip: which merge fields carry over, how subscription status works, how to start a Customer Journey for new leads, and the yearly API key expiry that quietly breaks integrations.
Facebook keeps instant-form leads in Leads Center, so you need a connector to send them to Mailchimp. In LeadSender: connect Facebook, choose Facebook Leads to Mailchimp, pick your Page and form, paste a Mailchimp API key, choose your audience and tags, then turn it on. Every new lead becomes a subscribed, tagged Mailchimp contact within seconds.
How to connect Facebook lead ads to Mailchimp with LeadSender
Start a free trial and connect Facebook
Start your 7-day free trial of LeadSender (no card needed) and sign in with the Facebook account that manages your Page. That lets LeadSender hear about each new lead the moment it's submitted.
Choose the Mailchimp template
From Integrations, pick Facebook Leads to Mailchimp. Then select your Facebook Page and the lead form you want to send.
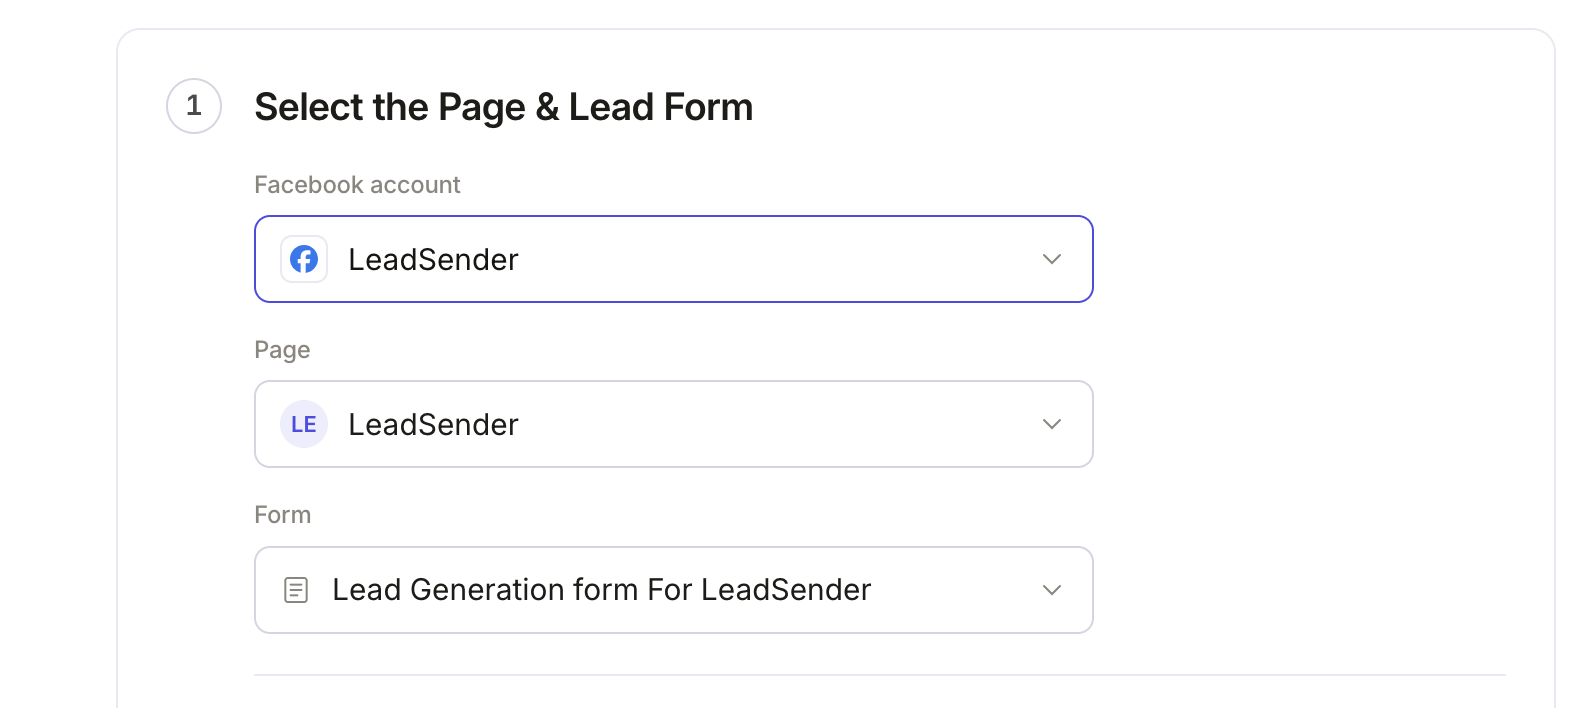 Select your Page
and lead form
Create a Mailchimp API key
In Mailchimp, click your profile picture, then Profile, Extras and API keys. Under Your API keys, click Create A Key.
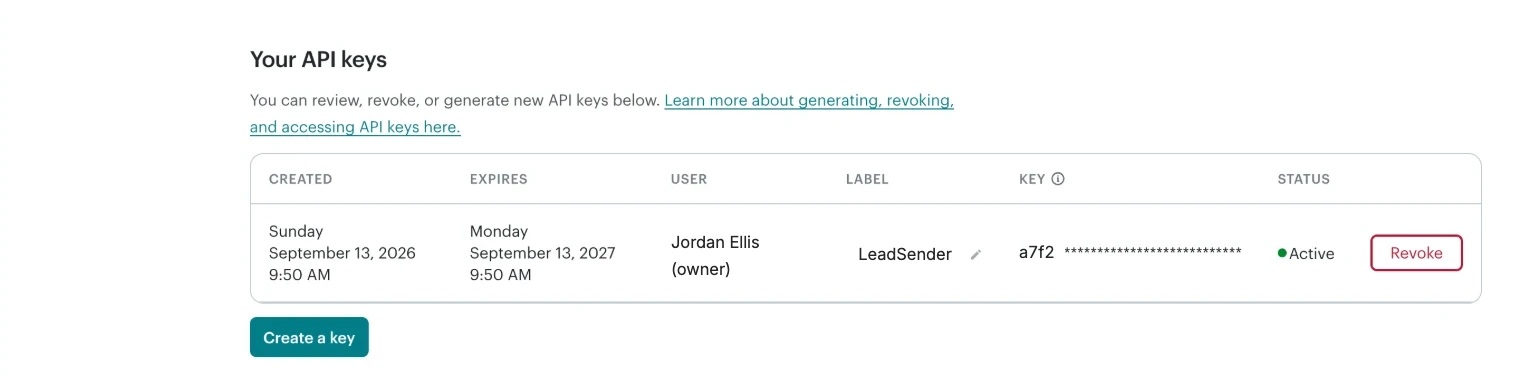 Click Create a key
Name the key LeadSender so you know which app uses it, then click Generate Key and copy it. Mailchimp only shows the full key once, so paste it into LeadSender straight away.
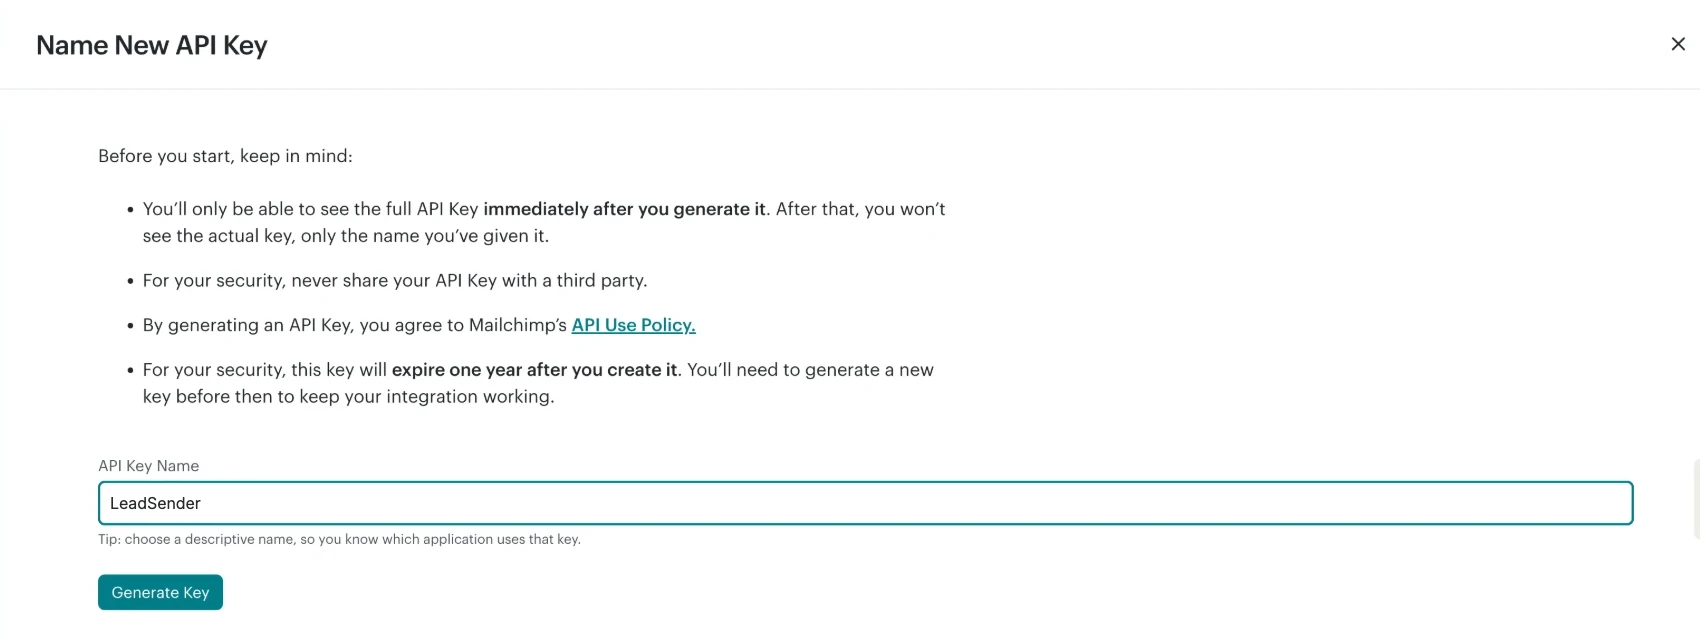 Name it LeadSender, then Generate Key
Connect Mailchimp
Back in LeadSender, click Connect next to Mailchimp, paste the key and click Connect. The key stays on LeadSender's servers.
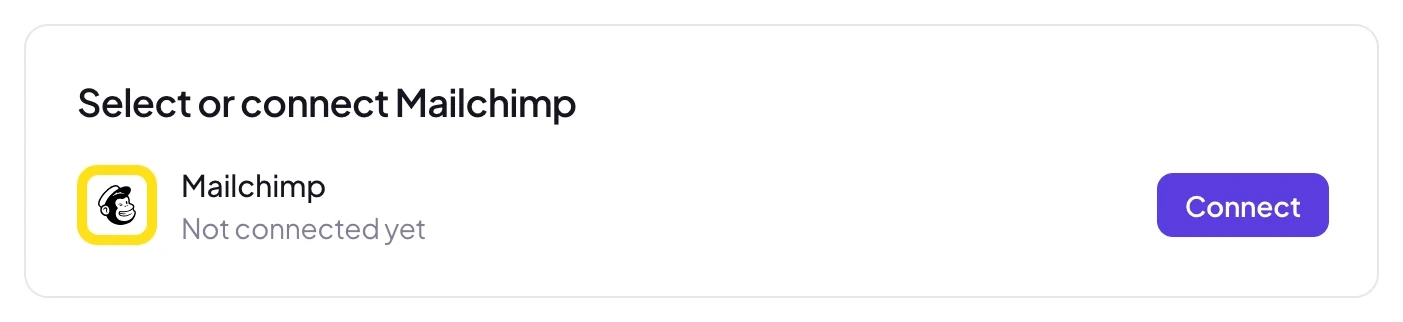 Click Connect
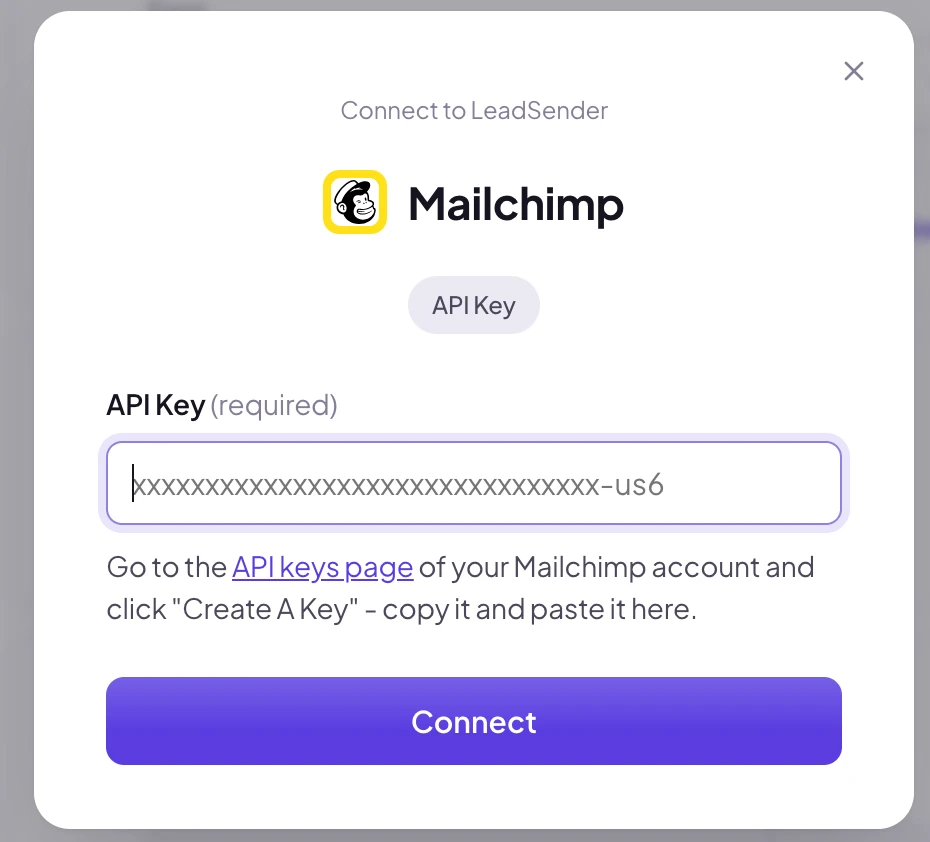 Paste your key here
Pick your audience and tags
Under Add new contacts to this audience, choose the Mailchimp audience for these leads. Then pick any tags, or type a new tag name to create it. Both come live from your Mailchimp account.
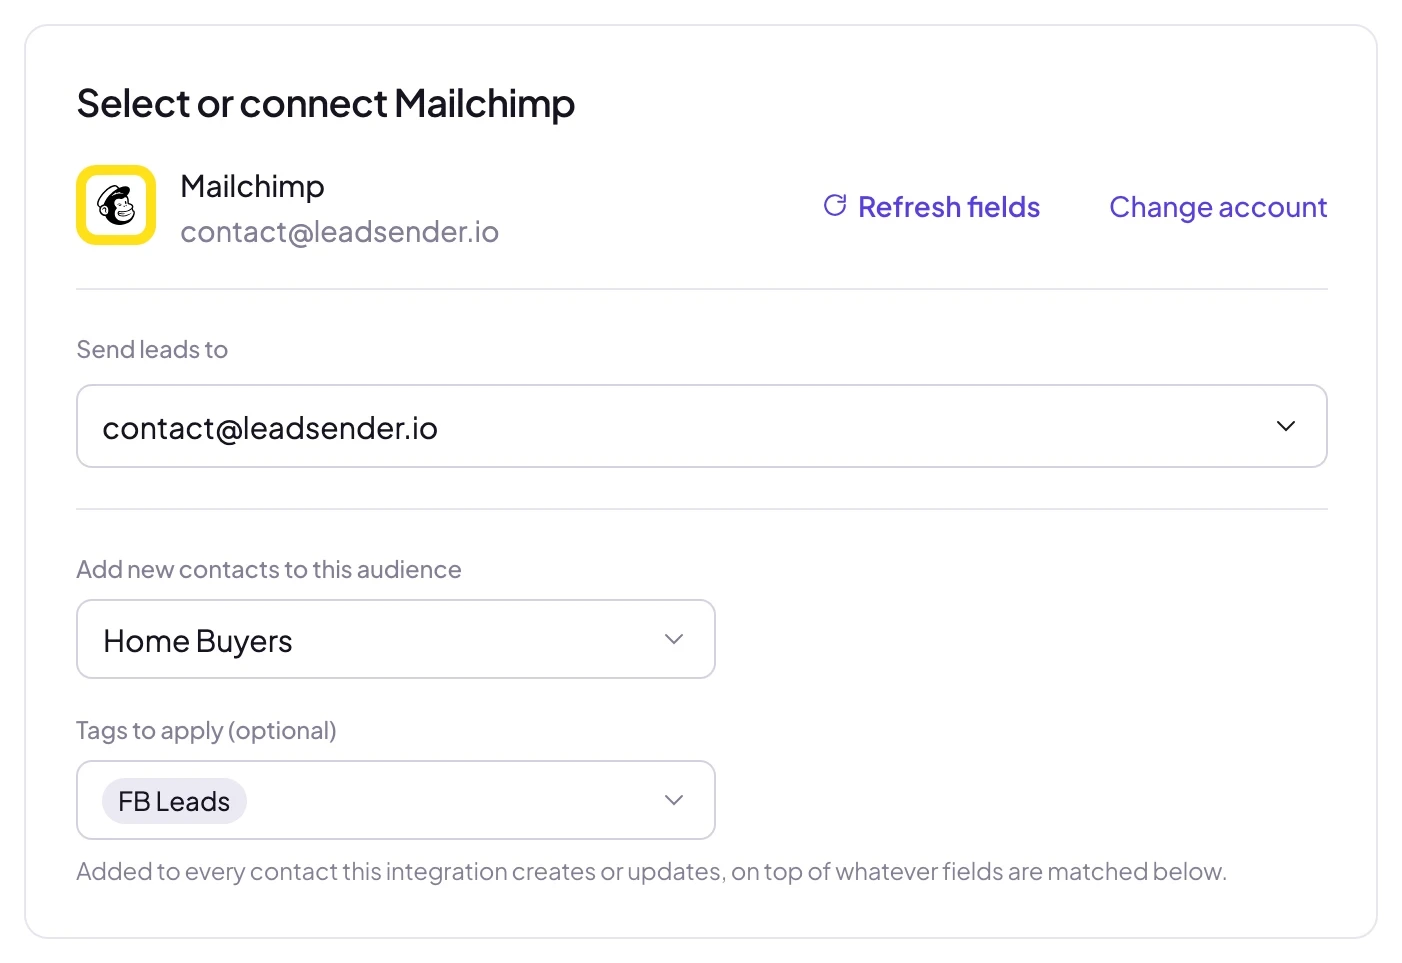 Choose your audienceTags start your journeys
Match your fields, test and turn on
In Match your fields, your audience's real merge fields are listed, and name, email and phone are matched for you. Pick a form answer for any other field, then click Send a test lead. Need a fresh lead to test with? Create one with our free Meta Lead Ads Testing Tool.
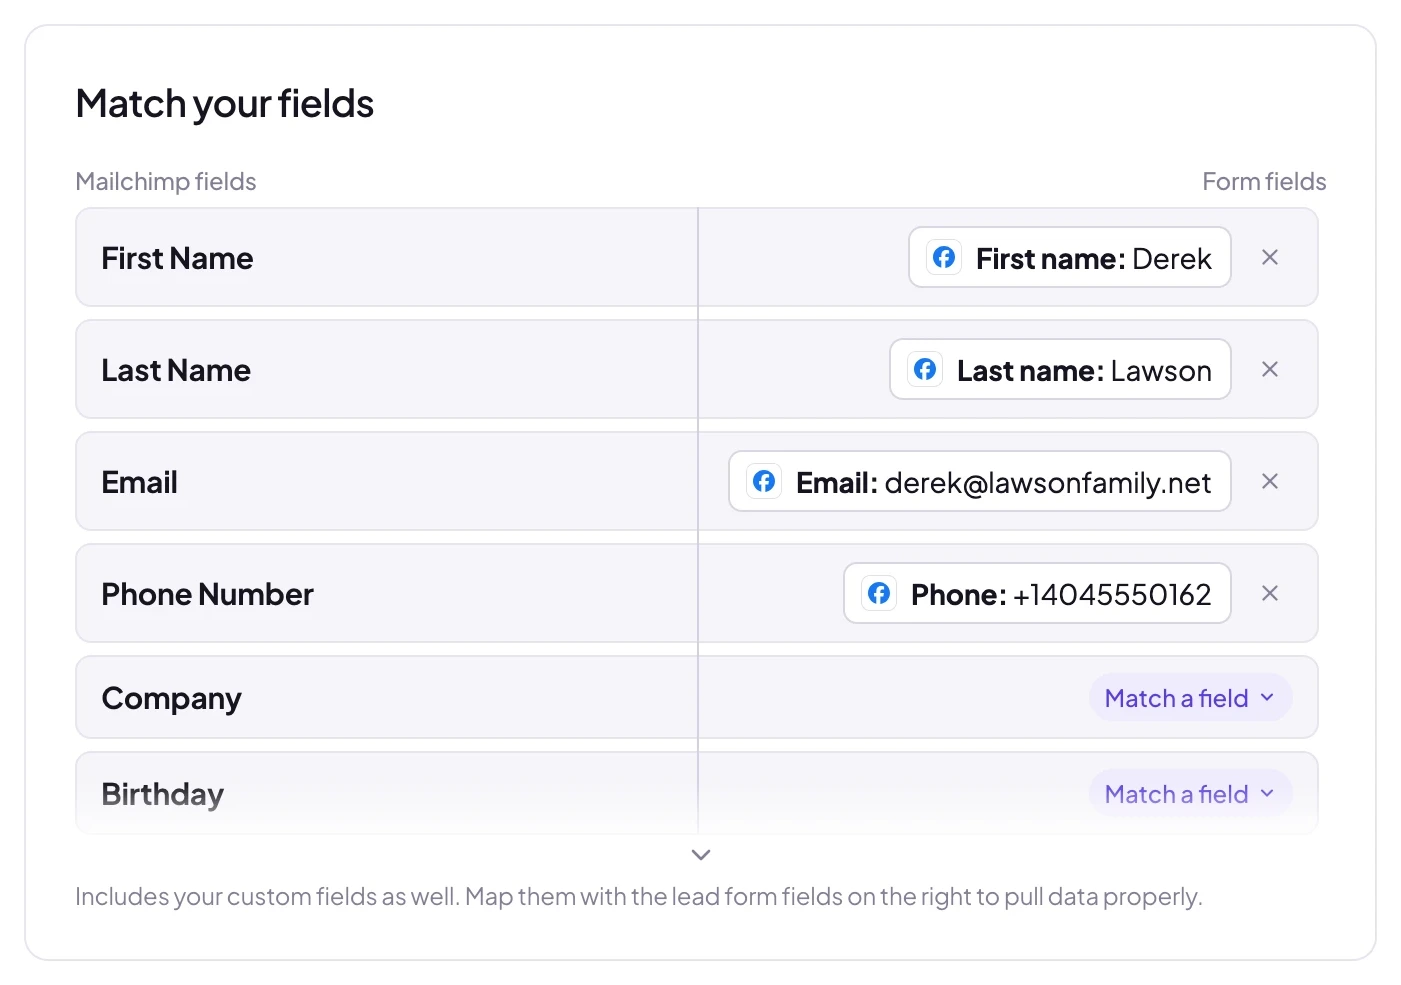 Matched for you
Open Audience in Mailchimp and the test lead is already there, subscribed and tagged. When it looks right, click Turn on. From then on every new lead from that form, on Facebook or Instagram, is added to Mailchimp within seconds.
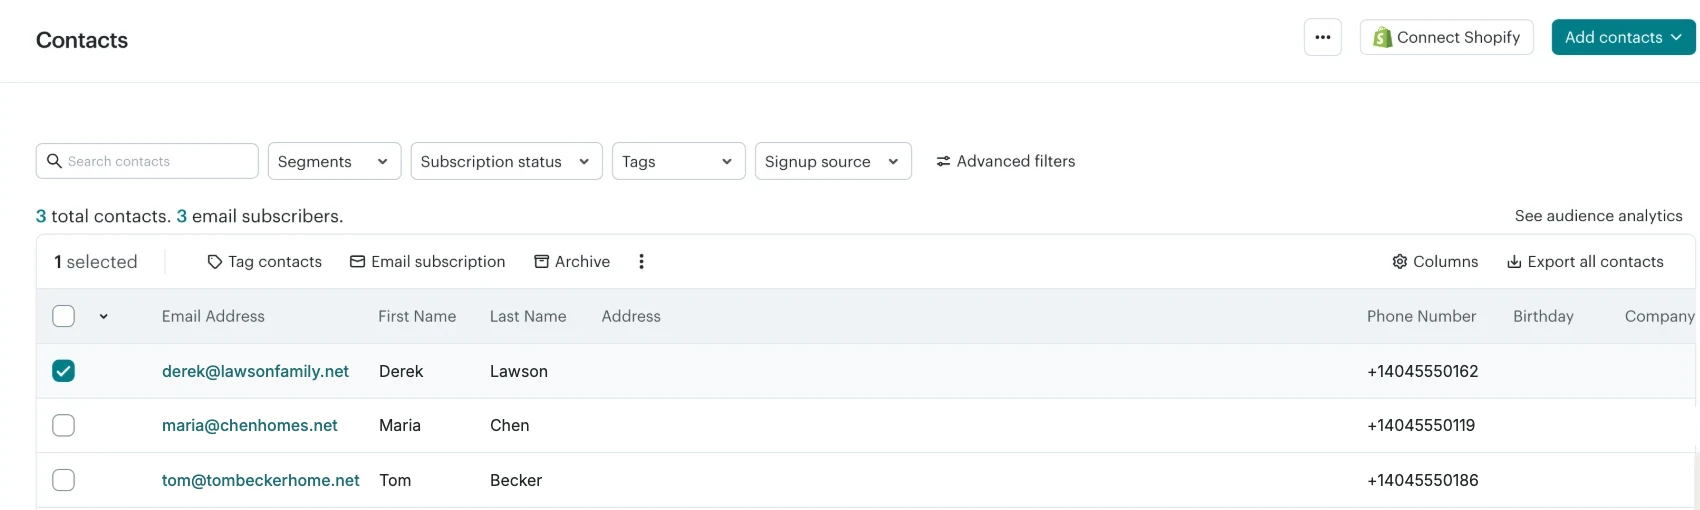 Added by LeadSender in seconds
Which fields reach Mailchimp
Mailchimp stores contact details in merge fields, and each audience has its own. LeadSender reads the merge fields of the audience you pick, so you only ever see fields that really exist.
- Email identifies the contact. Mailchimp can't add a lead without one, so make sure your form asks for it.
- First Name, Last Name and Phone Number are matched for you.
- Company and your own merge fields, such as budget, timeframe or interest, can be matched to any form answer.
- Address merge fields aren't listed. Mailchimp needs them as separate street, city, state and ZIP parts, and a single address answer can't fill them correctly. Add a text merge field such as “Property address” instead.
- Birthday fields only accept a month and day (MM/DD). Match them only if your form asks the question that way.
Added a merge field in Mailchimp after setting up the integration? Click Refresh fields and it appears in the list.
Subscribed, double opt-in and existing contacts
- New people are added as subscribed, so they receive your campaigns and journeys straight away. Mailchimp's double opt-in email isn't sent.
- People already in the audience are updated with the new answers and tags, and their subscription status is left as it is. Someone who unsubscribed stays unsubscribed.
- Duplicates aren't created: Mailchimp matches contacts by email address.
Because leads go straight in as subscribed, say in your lead form's privacy policy or intro that you'll follow up by email.
Send a welcome email the moment a lead arrives
Getting leads into Mailchimp is half the job; the other half is replying while they're still interested. Tags make this easy:
- In Mailchimp, go to Automations and create a Customer Journey.
- Choose the starting point Tag added and pick the tag you chose in LeadSender, for example FB Leads.
- Add a Send email step with your welcome message, and turn the journey on.
Every Facebook lead now gets your welcome email within minutes of submitting the form.
Running several ads? Give each form its own tag, like FB Free Valuation or FB Open House, and start a different journey on each. Every lead gets the follow-up that matches the ad they answered.
Mailchimp API keys expire after a year
Mailchimp now sets every new API key to expire one year after you create it. When the key expires, Mailchimp rejects new leads, and they stop arriving in your audience. Most setup guides don't mention it.
- Check the Expires date on Mailchimp's API keys page.
- A week or two before, create a new key, open your integration in LeadSender, click Change account and paste the new key.
- If a lead ever fails, it's listed in LeadSender's Run history with Mailchimp's reason, and you can resend it once the new key is in.
LeadSender vs Zapier vs CSV imports
| LeadSender | Zapier | CSV import | |
|---|---|---|---|
| Price | From $9.99/mo | From $29.99/mo (Facebook Lead Ads is a premium app) | Free |
| Speed | ✓ Seconds | Depends on plan | ✗ Whenever you remember |
| Setup | ✓ About 3 minutes, guided | ⚠ Build and test a Zap | ⚠ Every time, by hand |
| Tags | ✓ Pick or create from your account | ⚠ A separate Zap step | ⚠ Per import |
| Merge fields | ✓ Your audience's real fields | ✓ Mapped in the Zap | ⚠ Matched on each import |
| Failed leads | ✓ Reason and resend in Run history | Zap history | None |
Short version: CSV imports are fine for a one-off list, but every hour of delay costs you opens and replies. Zapier works if you already pay for a premium Zapier plan. LeadSender is the simplest way to get every Facebook lead into Mailchimp the moment it comes in. More in LeadSender vs Zapier.
When a Facebook lead doesn't show up in Mailchimp
- The API key expired or was revoked: create a new key in Mailchimp and paste it with Change account.
- No email on the lead: Mailchimp needs one. Make sure your form asks for it and Email is matched.
- A merge field rejected the value: for example, a birthday answer that isn't MM/DD. Run history shows Mailchimp's exact reason; unmatch that field or change the question.
- You're looking in the wrong audience: Mailchimp shows one audience at a time. Switch audiences on the Audience page.
- Nothing at all: check the integration is turned on, then send a test lead and read the result. Every attempt is listed in Run history.
Comparing options? See how Facebook lead ads integration works, with the 5 ways to send leads to Email, SMS or your CRM compared.