














A Facebook lead is worth the most in the first few minutes, while they still remember your ad. If your sales team lives in Bitrix24, that lead should be there too, assigned to someone, not waiting in Facebook's Leads Center for a CSV export.
This guide shows how to connect Facebook lead ads to Bitrix24 step by step, in about five minutes, with no CSV imports and no Zapier. Every lead lands as a lead or a deal, with your source and responsible person set and every answer in the comments, seconds after they submit your form.
Facebook keeps instant-form leads in Leads Center, so you need a connector to send them to Bitrix24. In LeadSender: connect Facebook, choose Facebook Leads to Bitrix24, pick your Page and form, paste a Bitrix24 inbound webhook link, pick a source and responsible person, then turn it on. Every new lead reaches Bitrix24 within seconds.
Before you start
Bitrix24 connects a little differently from most CRMs. Instead of an API key or a sign-in screen, you create an inbound webhook: a private link that lets LeadSender add leads to your Bitrix24. Two things to know first:
- You need a paid Bitrix24 plan or the free trial. Bitrix24 only allows inbound webhooks on paid plans or during its free 15-day trial. On the free plan, Developer resources shows an upgrade message instead.
- Create the webhook as a user who can add leads and deals, ideally an administrator. Bitrix24 acts as that user, so a user without CRM access gets an “Access denied” error.
How to connect Facebook lead ads to Bitrix24 with LeadSender
Start a free trial and connect Facebook
Start your 7-day free trial of LeadSender (no card needed) and sign in with the Facebook account that manages your Page. That lets LeadSender hear about each new lead the moment it's submitted.
Choose the Bitrix24 template
From Integrations, pick Facebook Leads to Bitrix24. Then select your Facebook Page and the lead form you want to send.
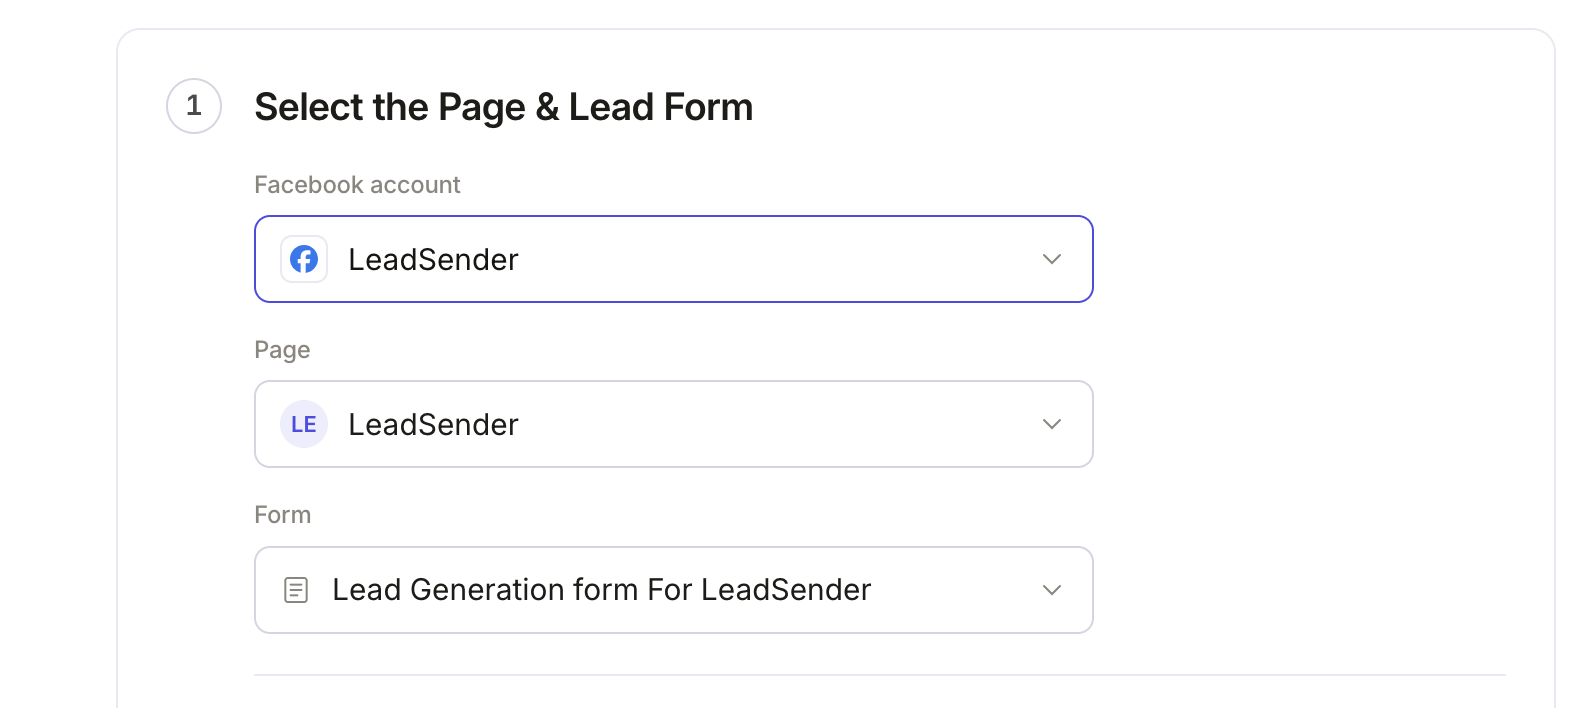 Select your Page
and lead form
Create an inbound webhook in Bitrix24
In Bitrix24, open Applications in the left menu, then Developer resources. Click the Other tile.
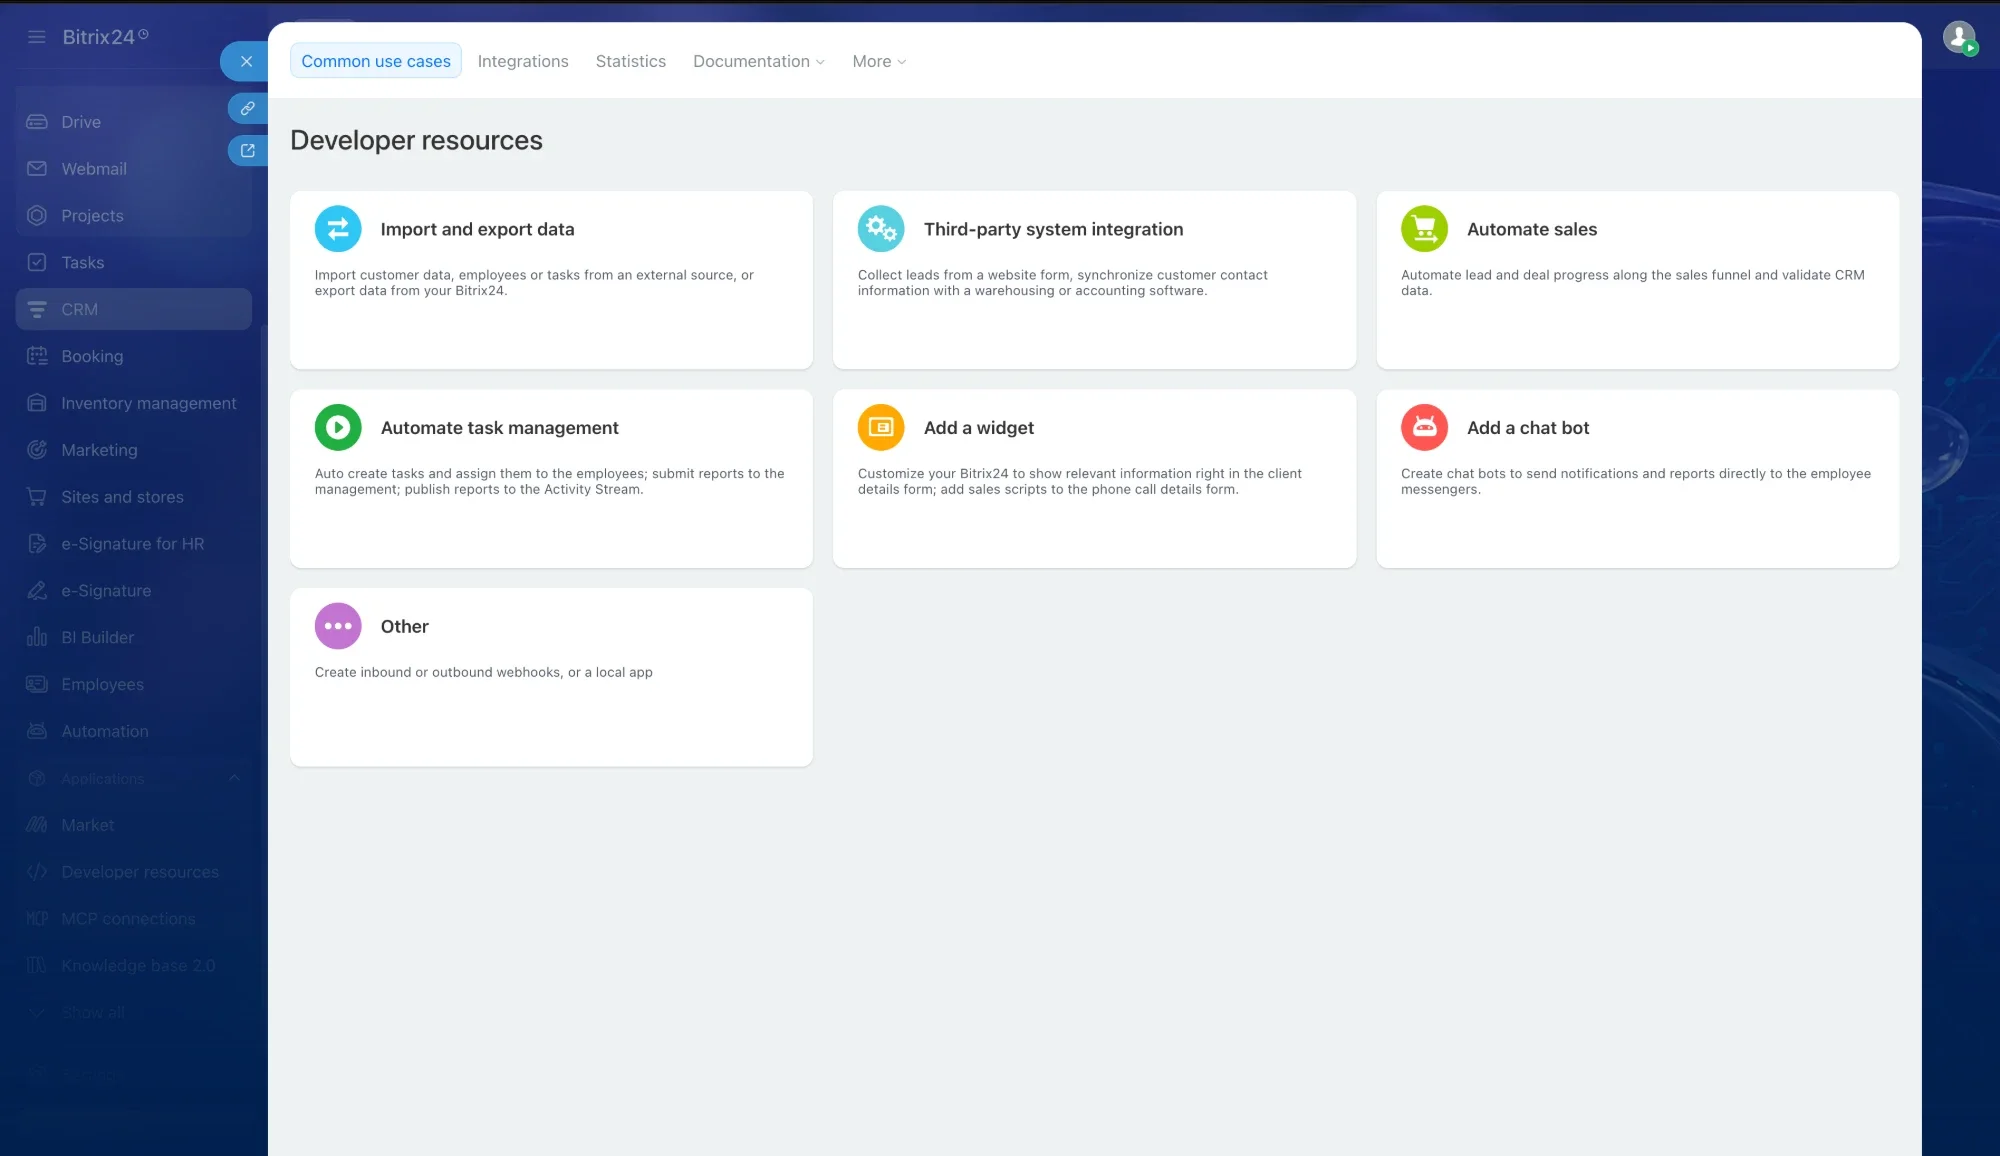 Click OtherApplications, then Developer resources
Then click Inbound webhook.
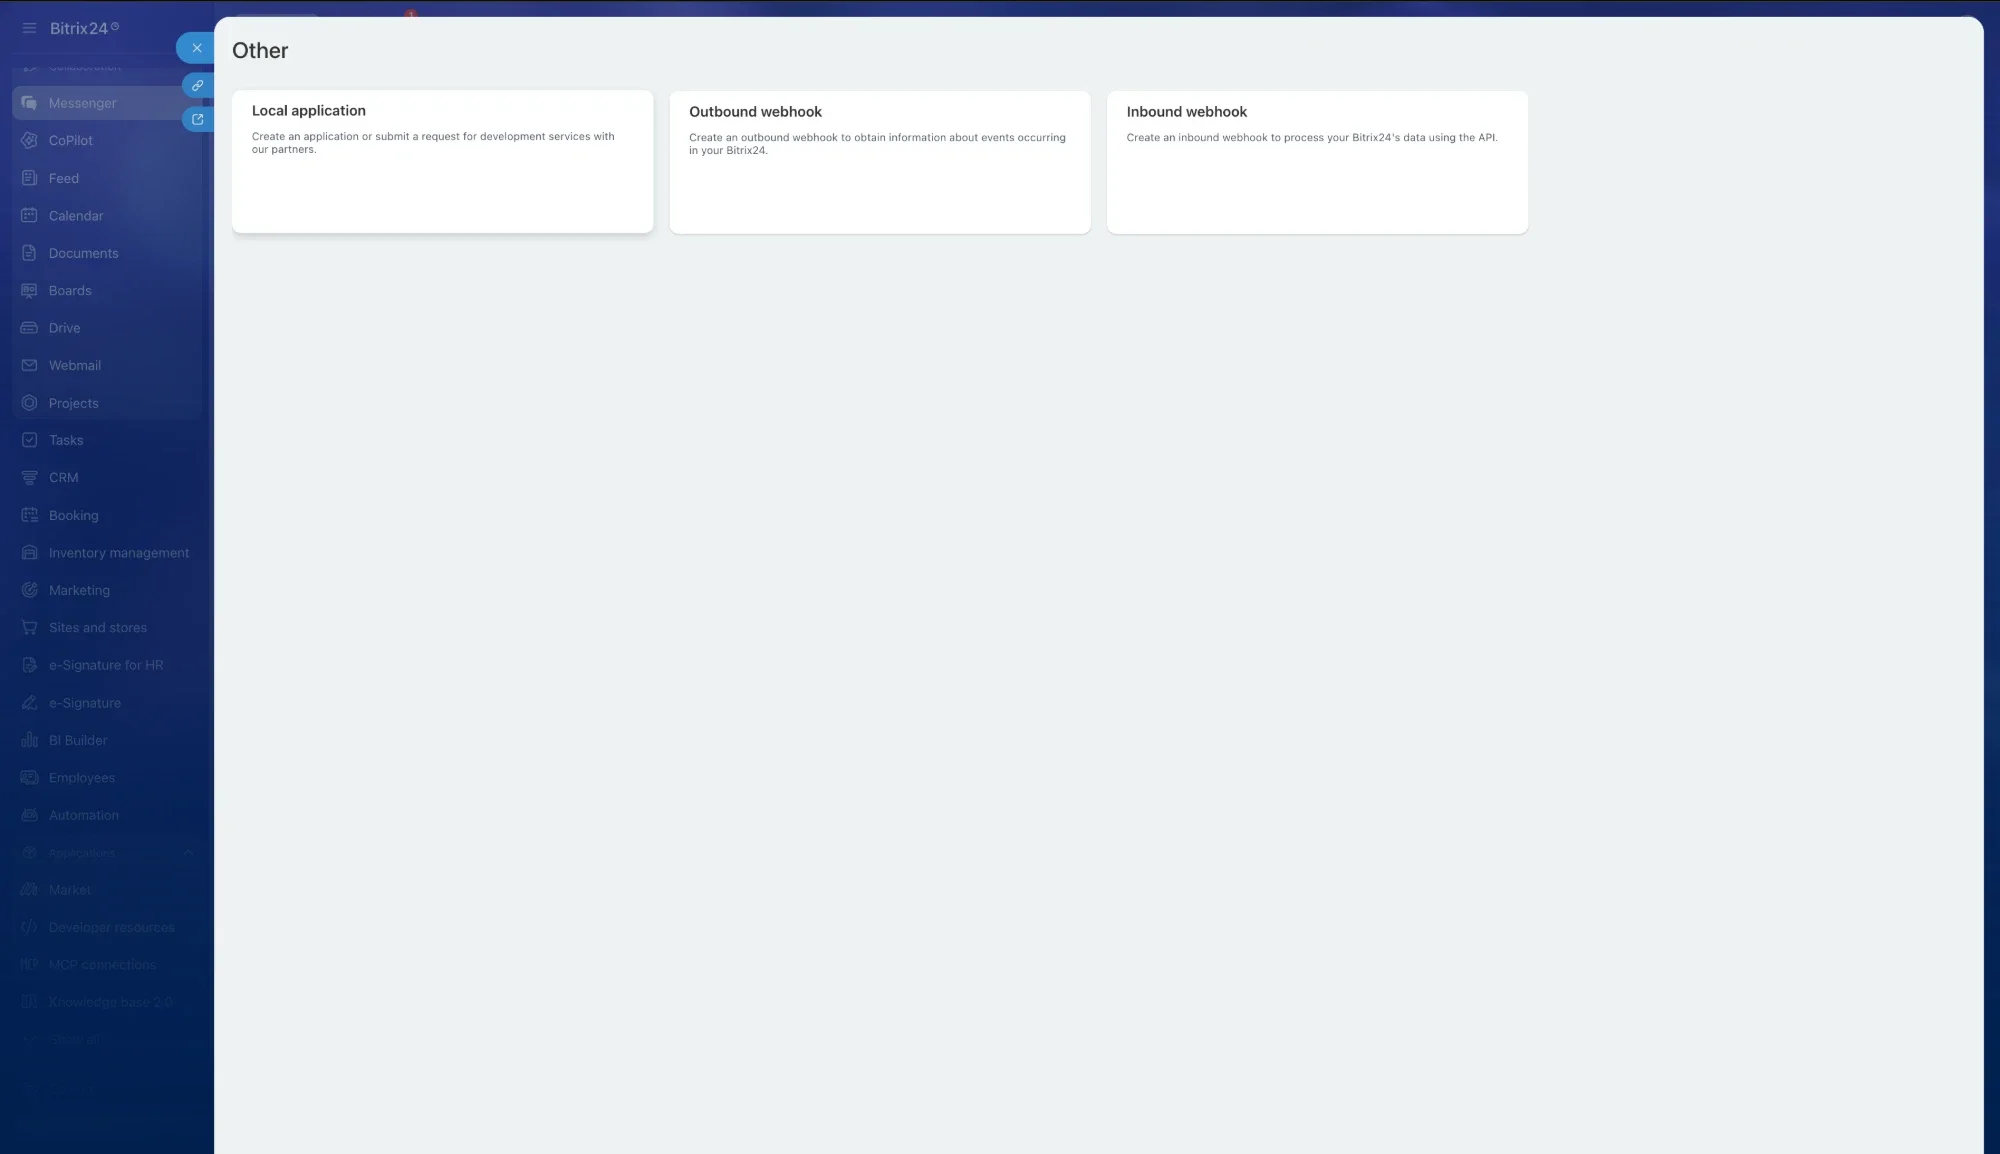 Click Inbound webhook
Bitrix24 opens a new webhook with its link already made. Three things to do on this page:
- Under Assign permissions, click + select and add CRM (crm) and Users (user). CRM lets LeadSender add leads and deals; Users lets you pick who they're assigned to.
- Copy the link under Webhook to call REST API at the top.
- Click Create at the bottom to save the webhook. The link only works once it's saved.
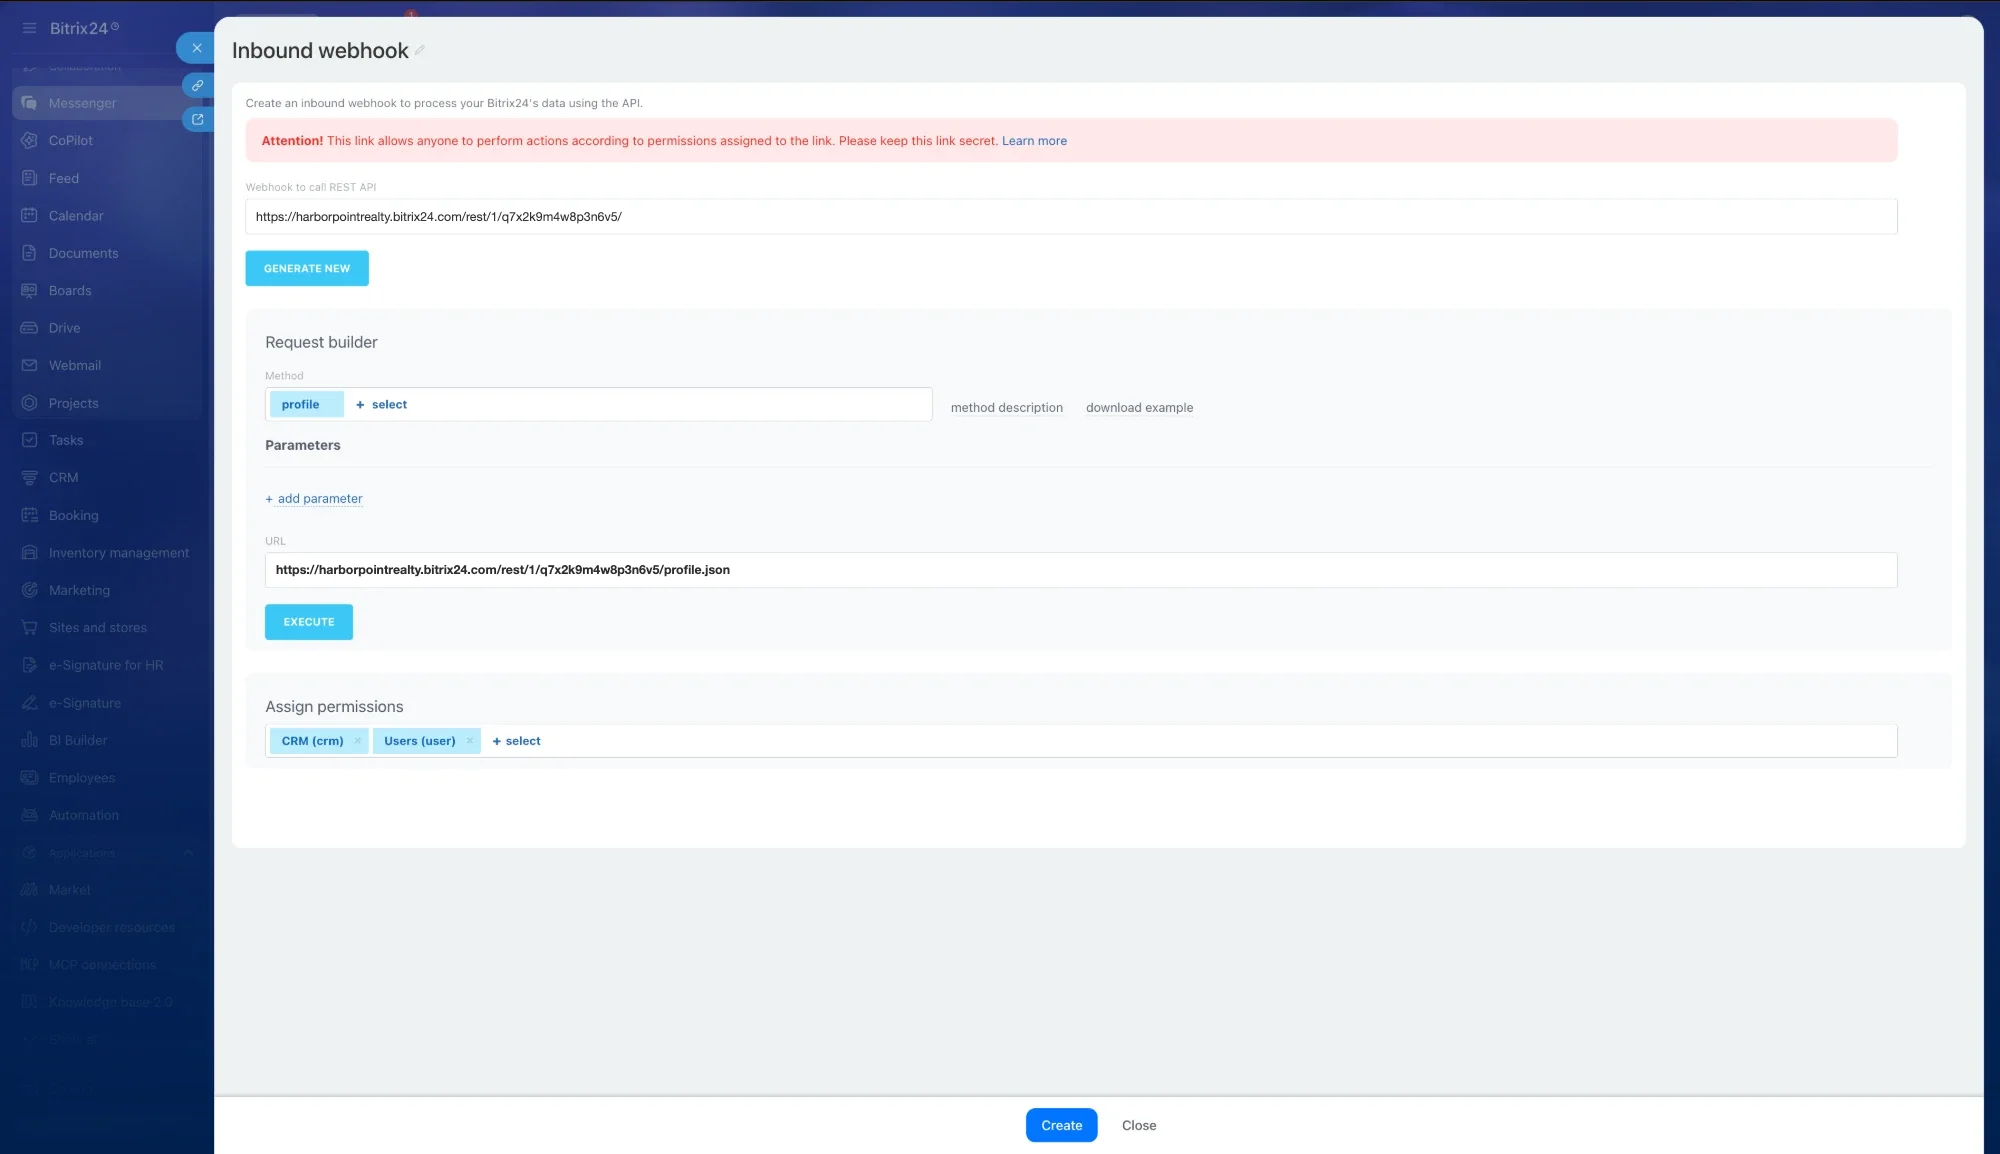 1. Add CRM and Users2. Copy this link3. Click Create
You can ignore the Request builder in the middle; it's for developers testing the API. Bitrix24 warns that anyone with this link can act on your CRM, so treat it like a password and only paste it into LeadSender.
Connect Bitrix24
Back in LeadSender, click Connect next to Bitrix24 and paste the link. LeadSender checks it with your Bitrix24 straight away, and the link stays on LeadSender's servers.
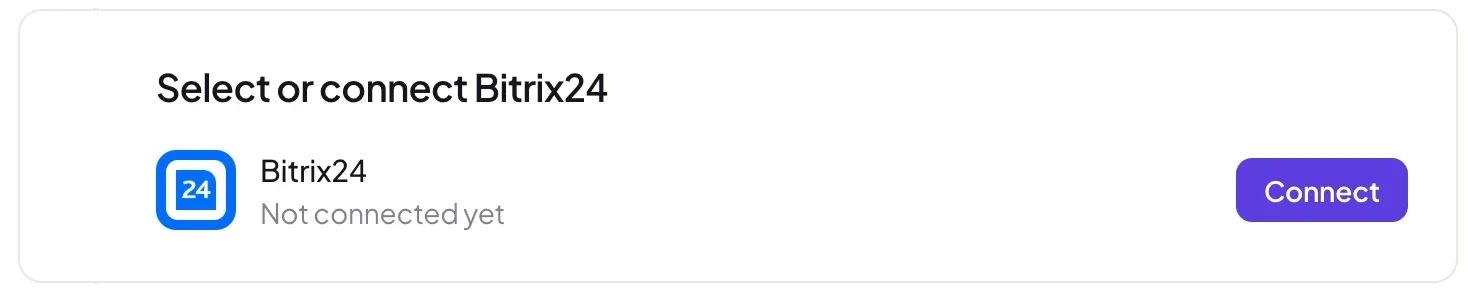 Click Connect
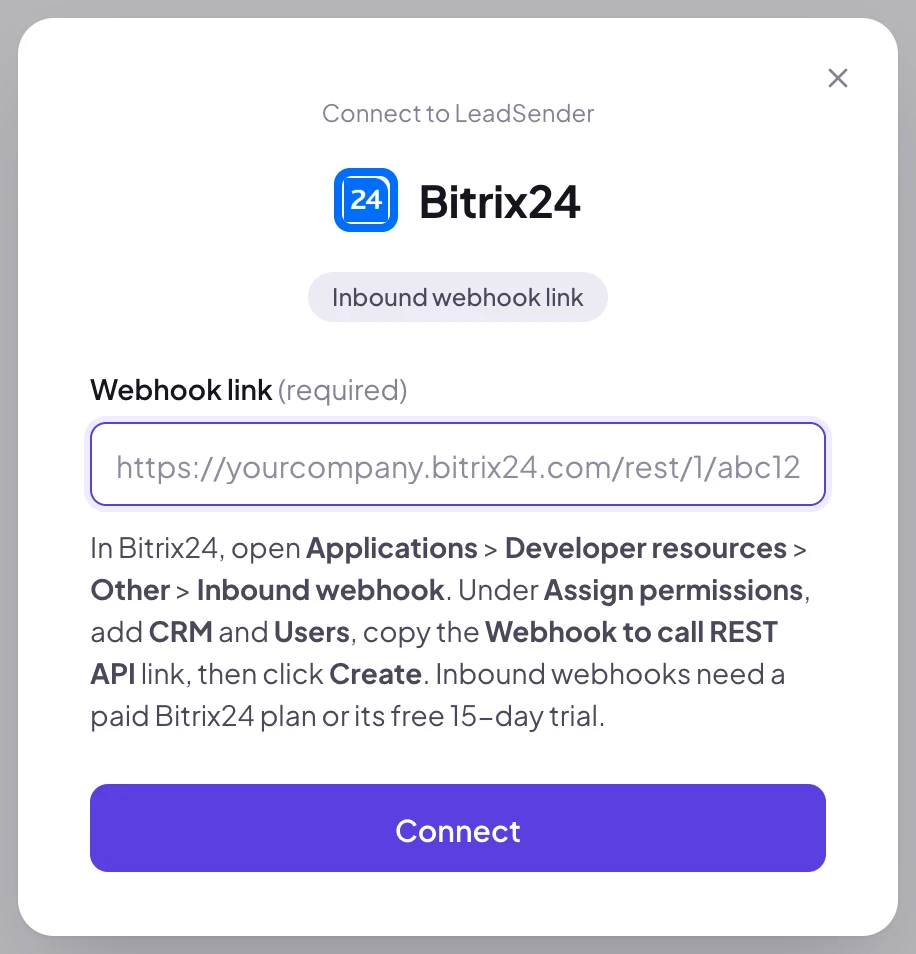 Paste your webhook link
Pick a source and a responsible person
Choose the Source every new lead gets, such as Advertising, so your Bitrix24 reports show which leads came from ads. Then pick the Responsible person they're assigned to. Both lists come live from your Bitrix24, custom sources included. LeadSender also tells you which CRM mode your Bitrix24 is in, so you know whether leads arrive as leads or deals.
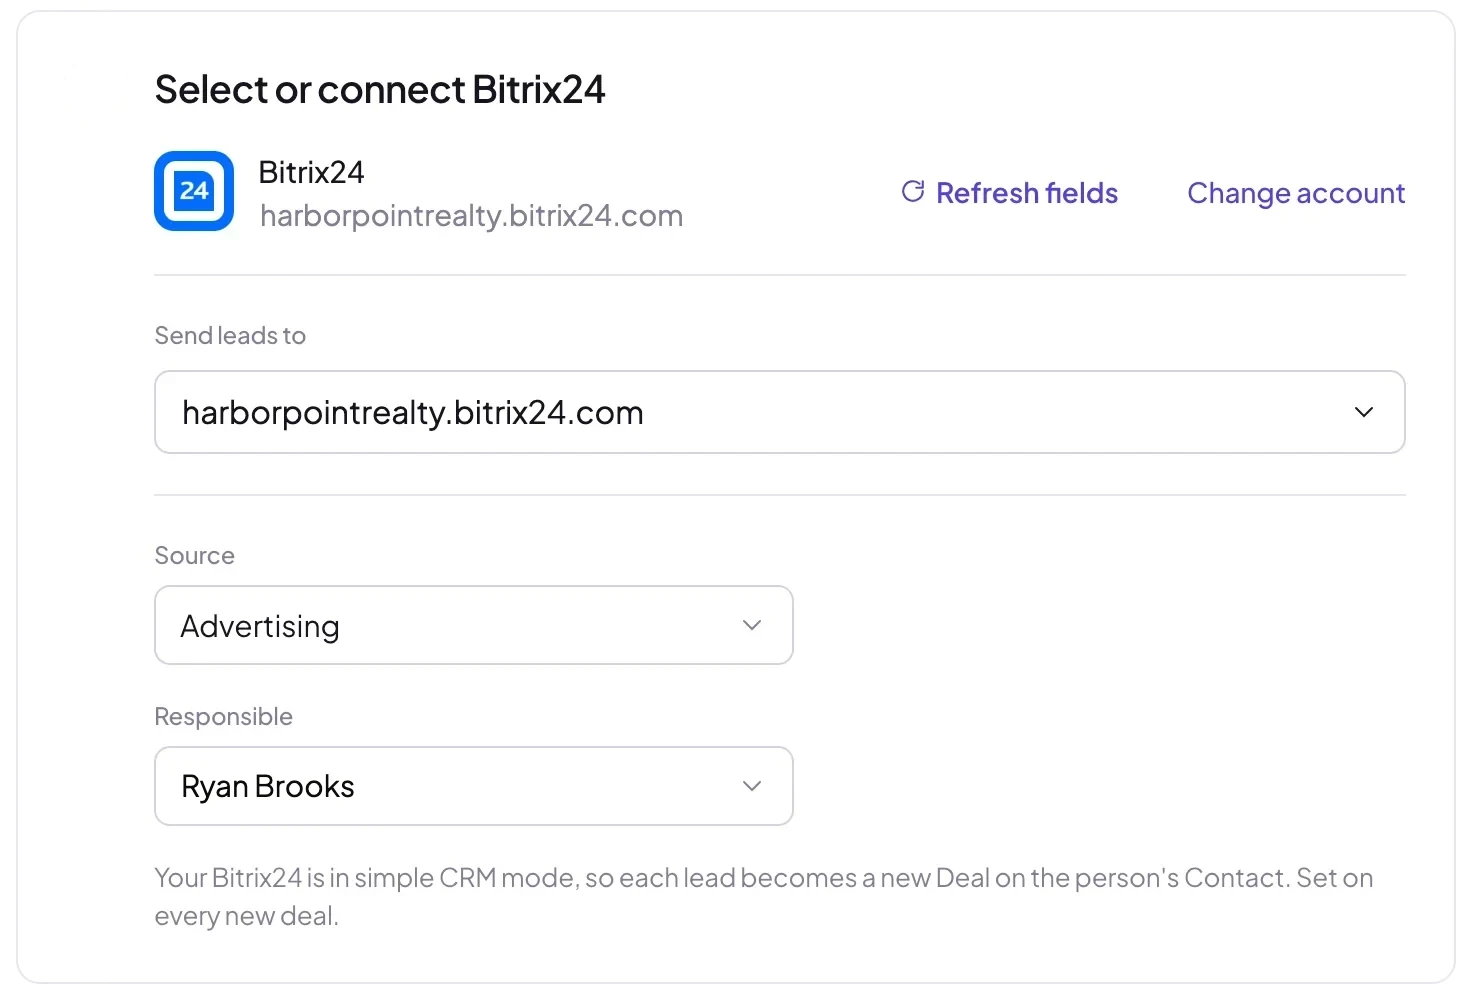 Lead sourceAssigned to
Match your fields, test and turn on
In Match your fields, name, email, phone and company are matched for you, and your own Bitrix24 custom fields are listed too. Then click Send a test lead. Need a fresh lead to test with? Create one with our free Meta Lead Ads Testing Tool.
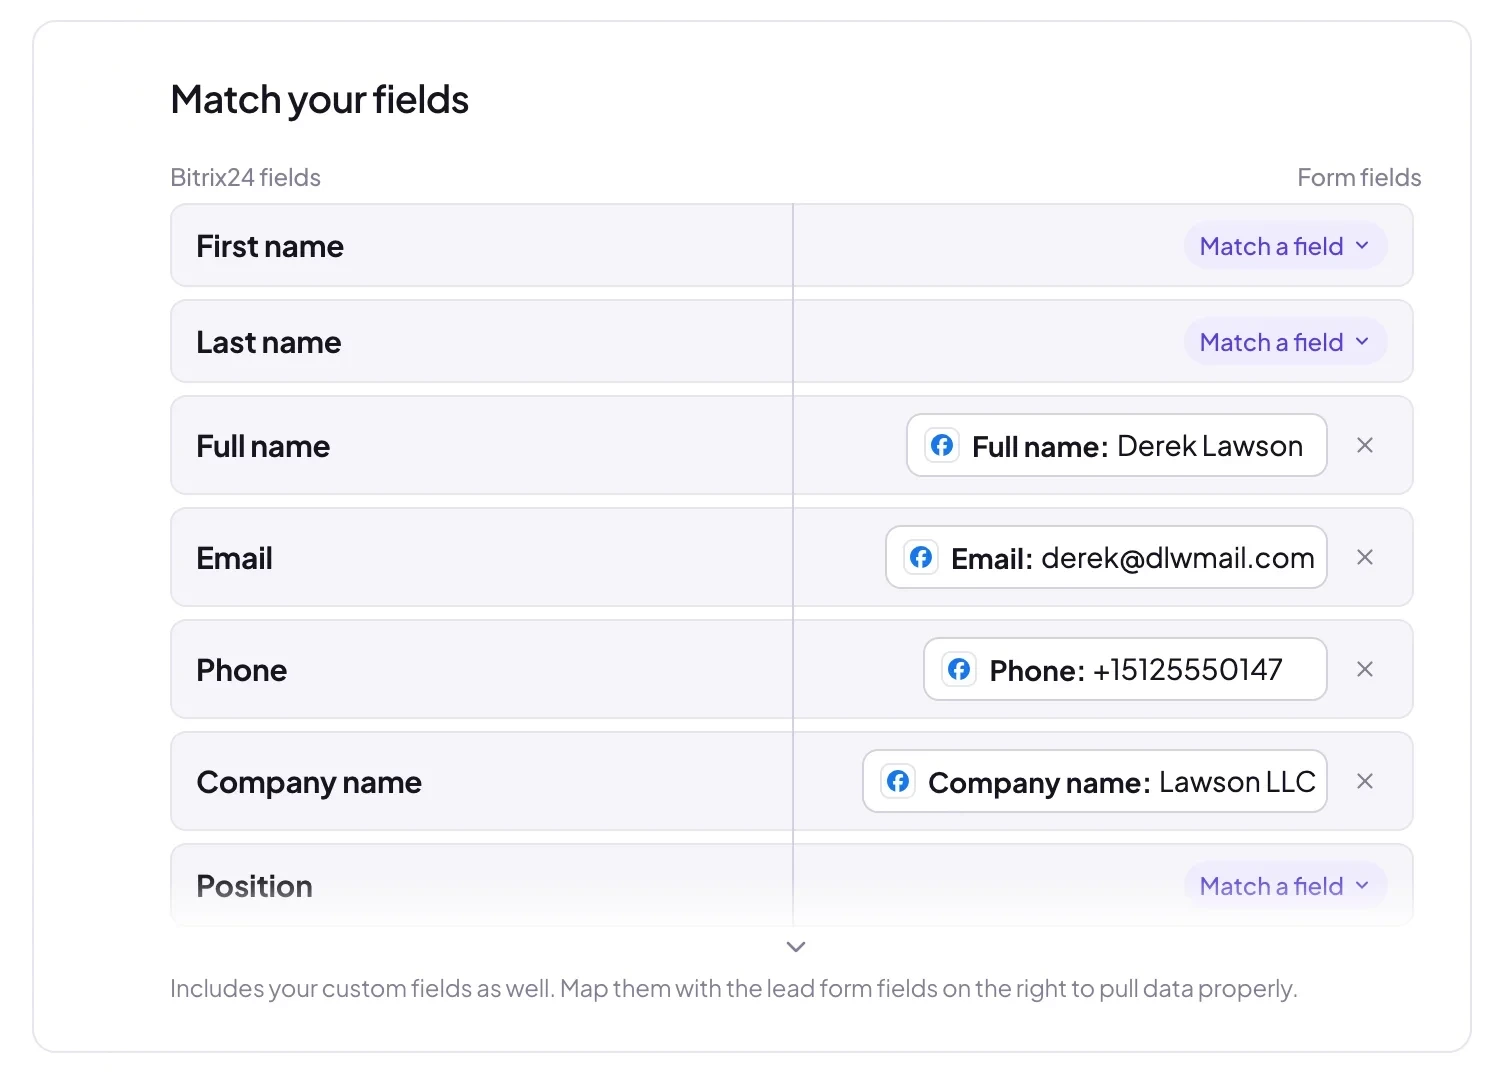 Matched for you
The test shows exactly what reached Bitrix24:
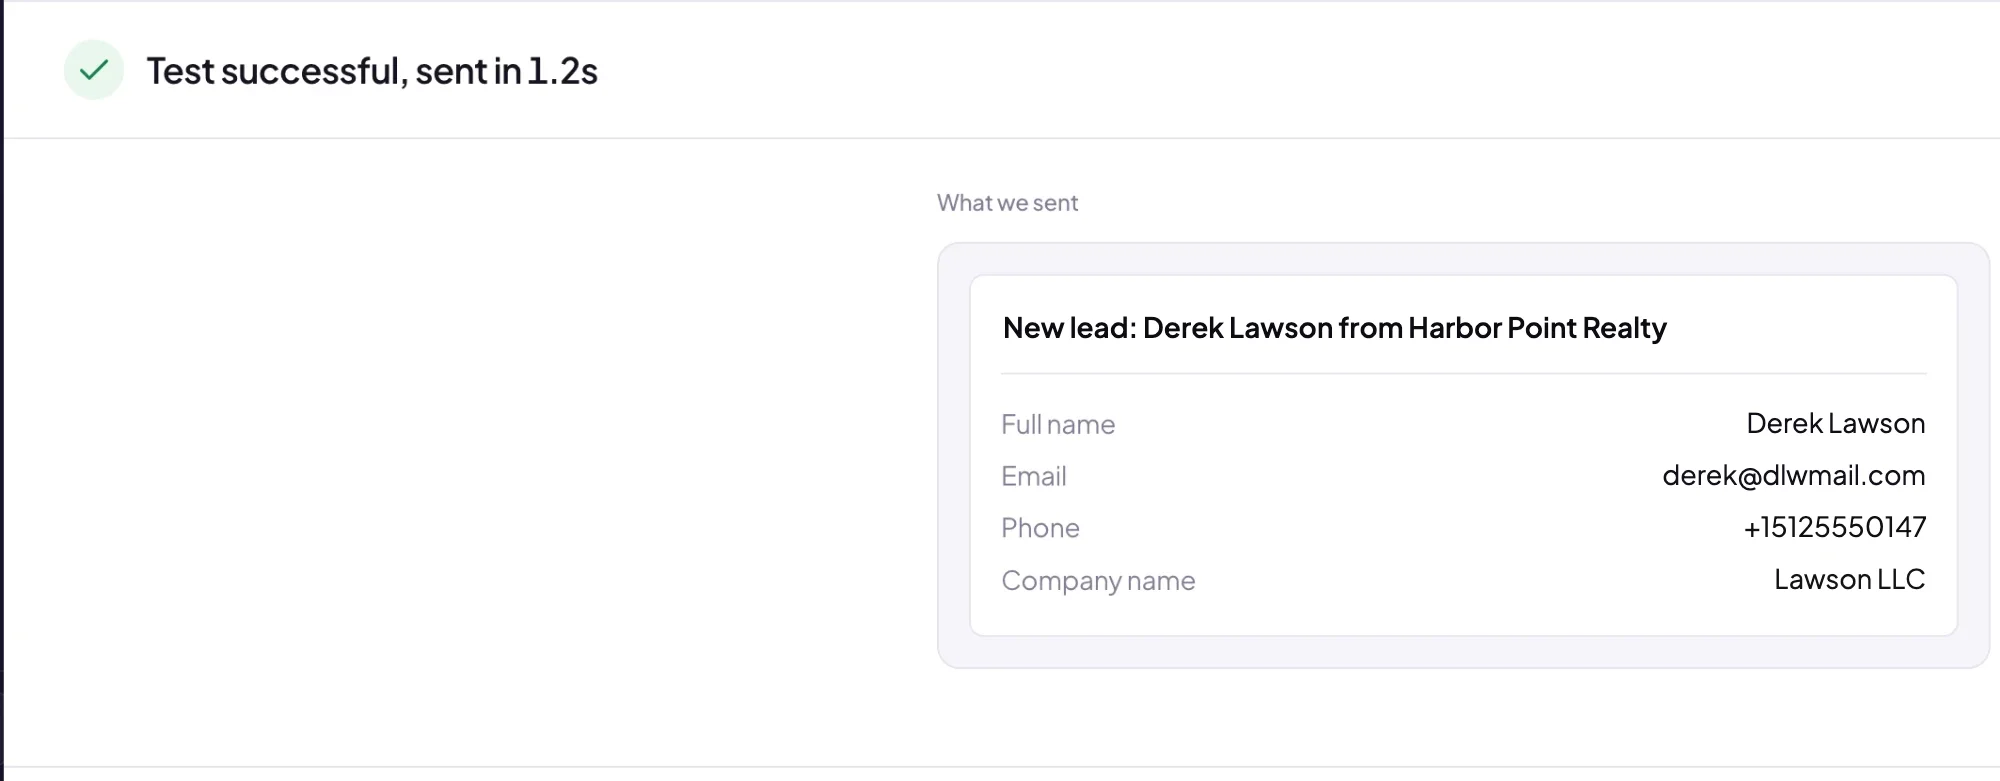 What Bitrix24 received
Open CRM in Bitrix24 and the test lead is already there. When it looks right, click Turn on. From then on every new lead from that form, on Facebook or Instagram, reaches Bitrix24 within seconds.
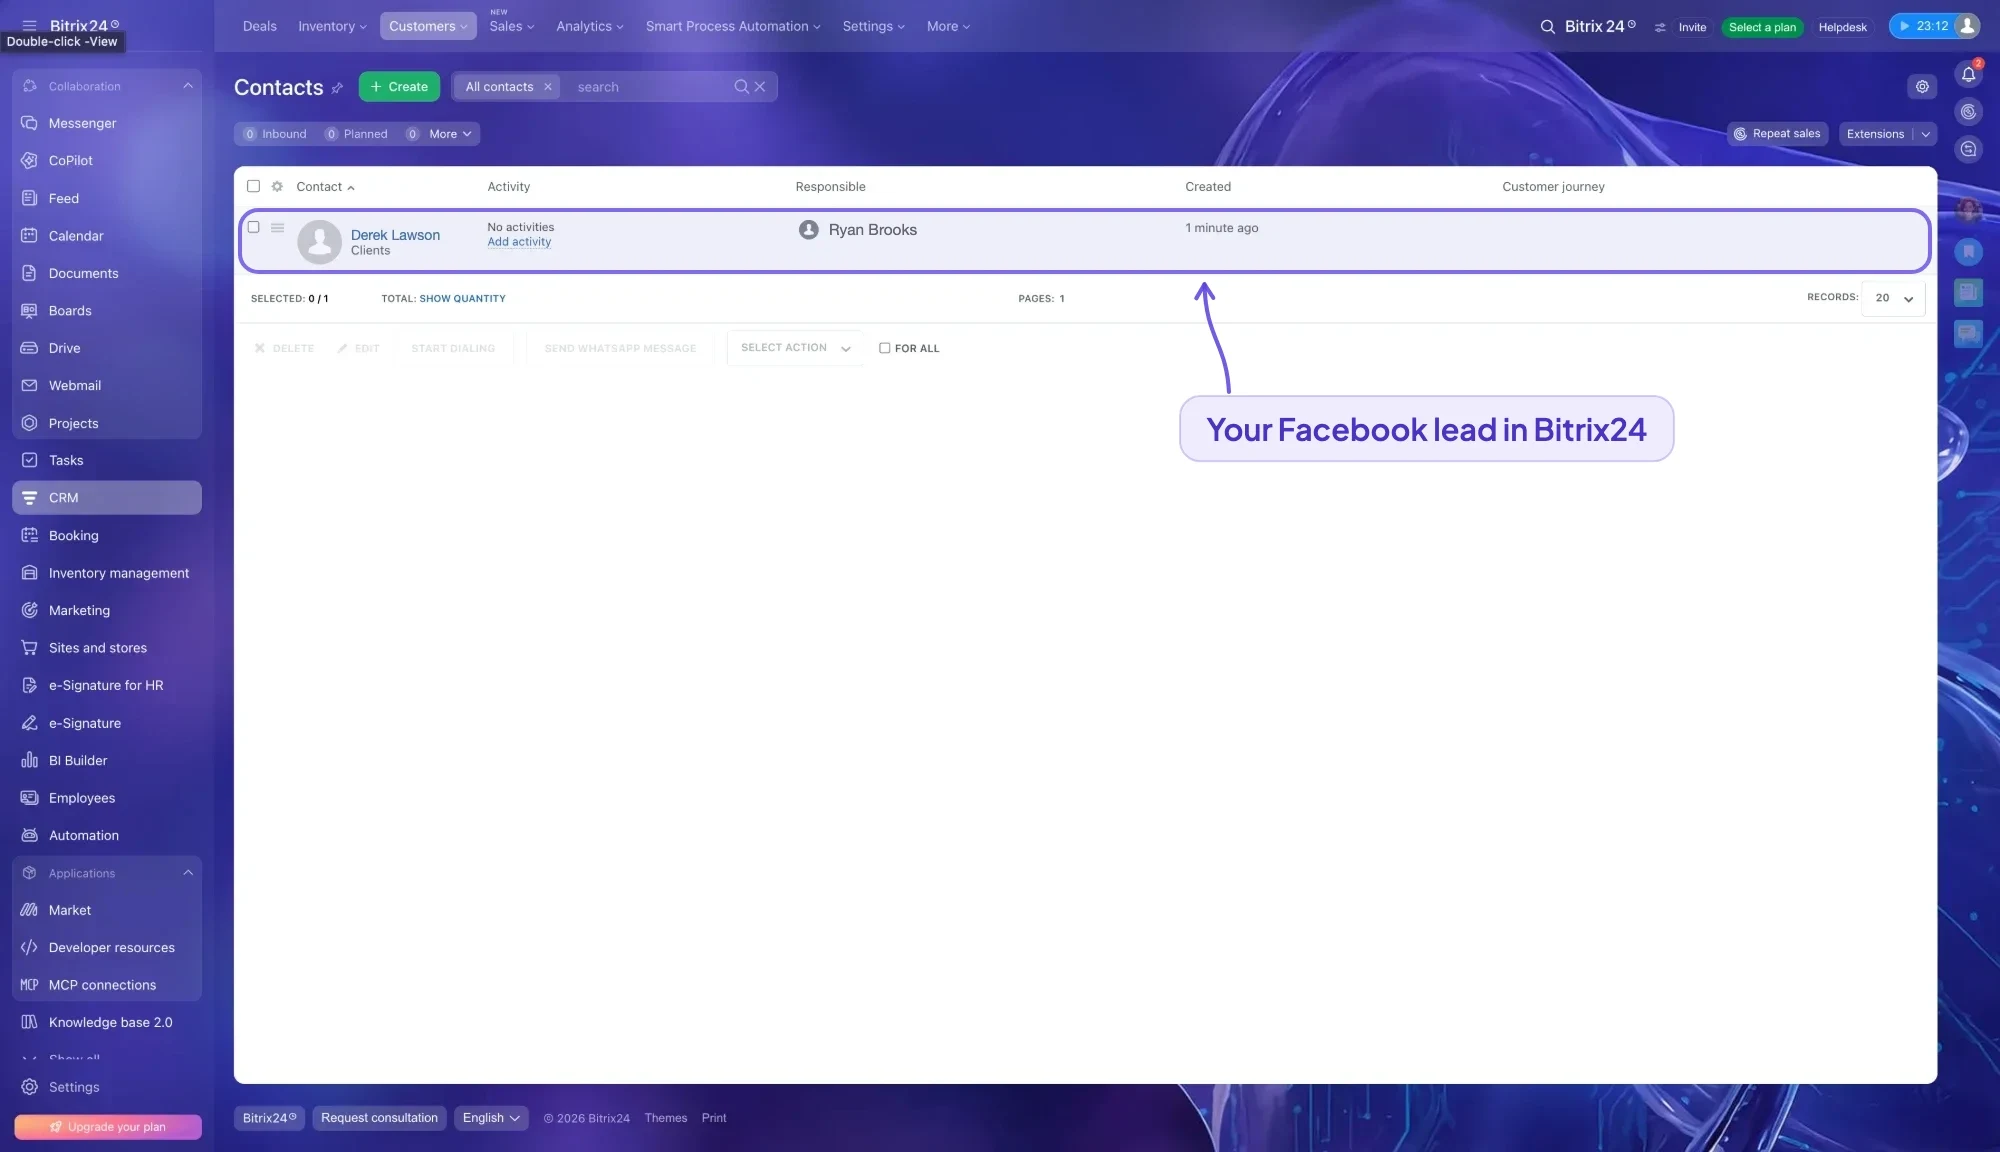
Lead or deal? Your CRM mode decides
Bitrix24 has two CRM modes, and LeadSender follows whichever yours uses, so every Facebook lead lands where your team already works:
| Your Bitrix24 | What each Facebook lead becomes |
|---|---|
| Classic mode (with leads) | A new Bitrix24 lead, titled “Facebook lead: <name>”, with the name, email, phone, company and position filled in |
| Simple mode (no leads) | A deal in the first stage of your pipeline, titled “Facebook lead: <name>”, on the person's contact |
In simple mode, a repeat enquiry doesn't make a second contact. LeadSender uses Bitrix24's own duplicate check to find the contact by email, then phone, and adds the new deal to it, so you see every enquiry from that person in one place.
Which fields reach Bitrix24
| Bitrix24 field | What happens |
|---|---|
| Name, email, phone | Filled from the form. A full name is split into first and last name for you |
| Company name and position | On the lead in classic mode; in simple mode the company is added to the deal's title |
| Source | The source you picked, such as Advertising |
| Source information | “Facebook Lead Ads” with the form and Facebook Page the lead came from |
| Responsible person | The person you picked |
| Custom fields | Your own Bitrix24 fields, matched to any question on your form: text, numbers, dates, links, yes/no and lists |
| Comments | Every answer on the form, so nothing is lost even if it isn't matched to a field |
Here is the test lead's contact, with the source and responsible person already set:
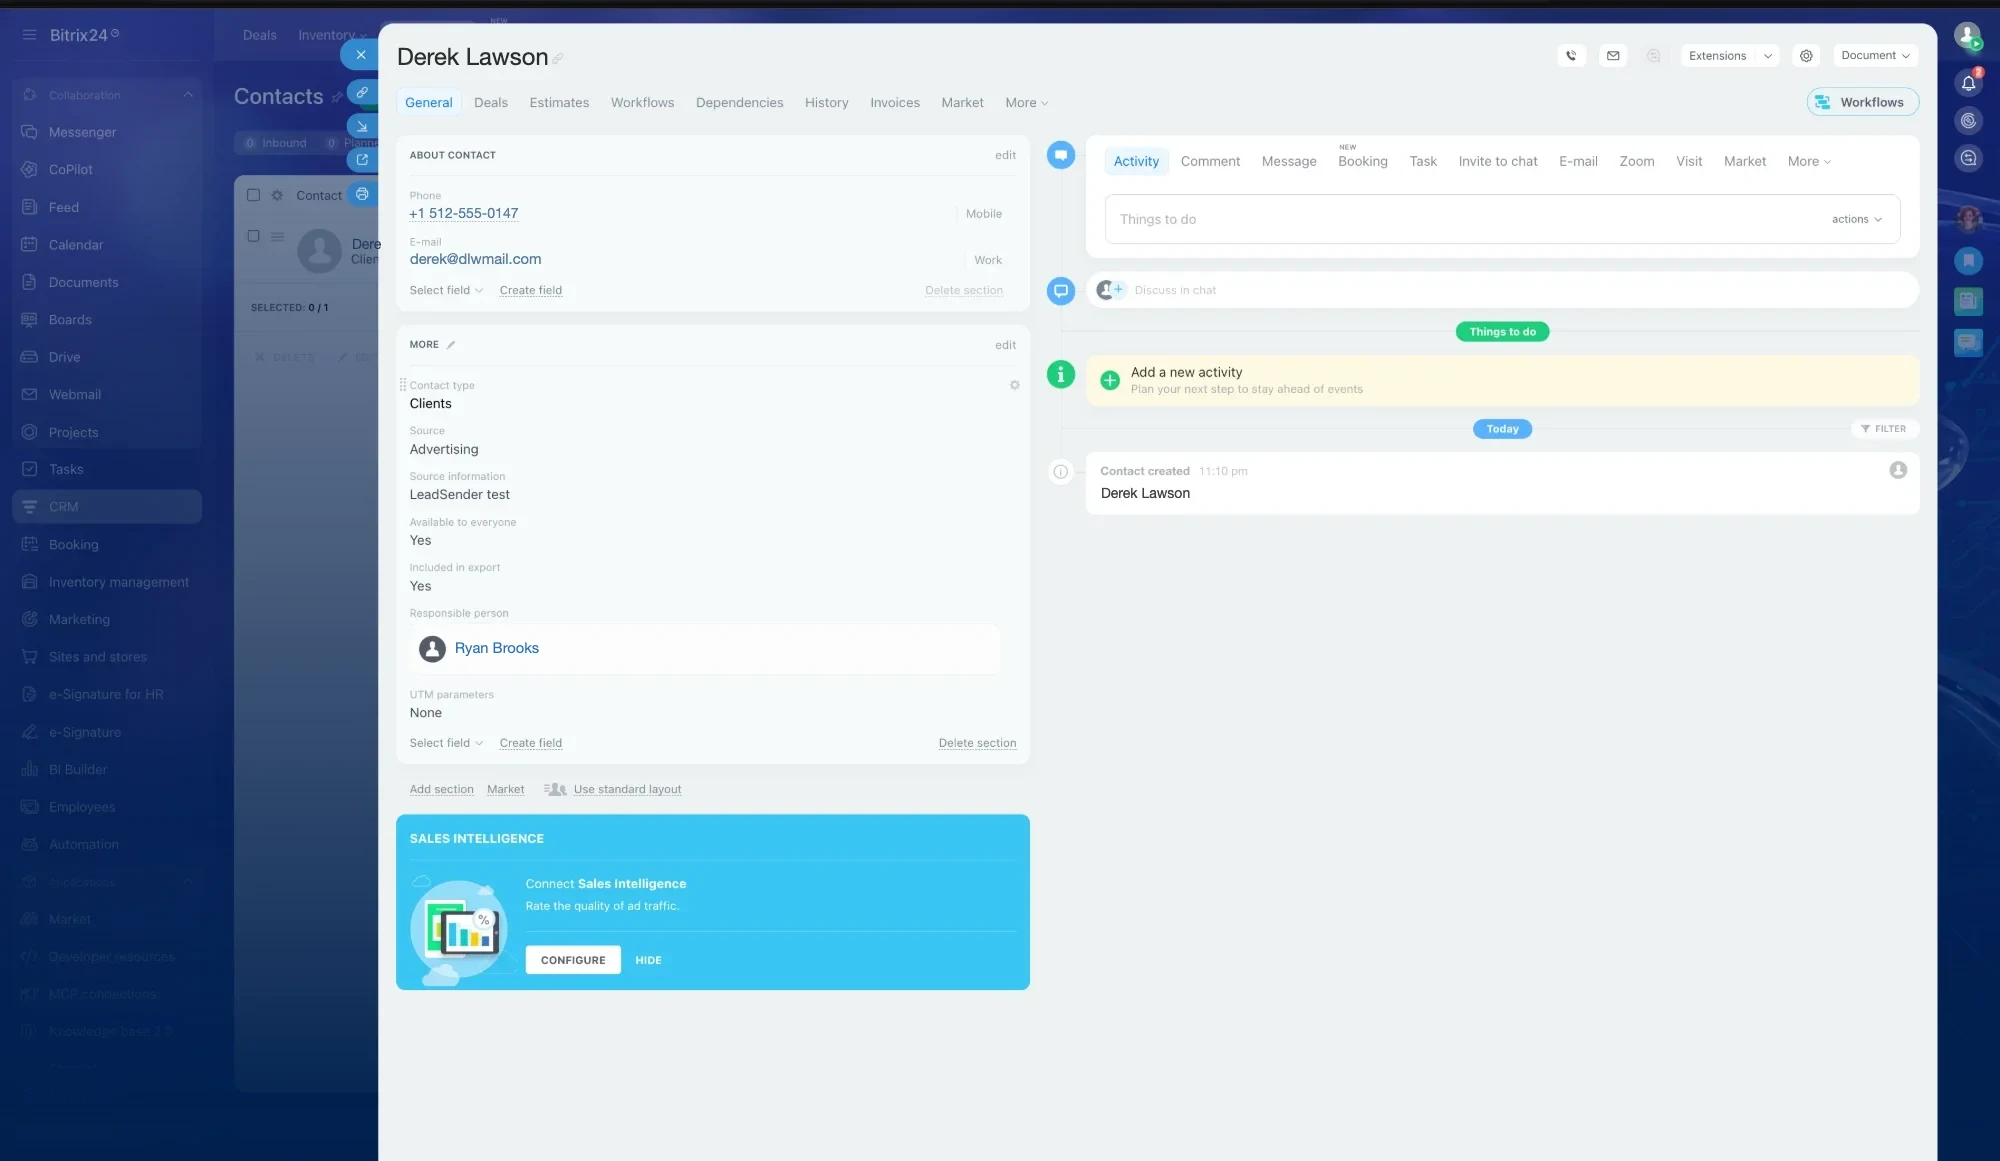
In Bitrix24, add an automation rule to the first stage of your pipeline, such as a task to call the lead or a notification to the responsible person. Every Facebook lead lands in that stage, so the follow-up starts the moment it arrives.
LeadSender vs Zapier vs CSV imports
| LeadSender | Zapier | CSV import | |
|---|---|---|---|
| Price | From $9.99/mo | From $29.99/mo (Facebook Lead Ads is a premium app) | Free |
| Speed | ✓ Seconds | Depends on plan | ✗ Whenever you remember |
| Setup | ✓ About 5 minutes, guided | ⚠ Build and test a Zap | ⚠ Every time, by hand |
| Follows your CRM mode | ✓ Lead or deal, automatically | ⚠ You pick and build it | ⚠ Pick on every import |
| Repeat leads | ✓ Reuses the contact | ⚠ Extra search step | ⚠ Merge by hand |
| Failed leads | ✓ Reason and resend in Run history | Zap history | None |
Short version: CSV imports are fine for a one-off list, but a lead imported tomorrow has already gone cold. Zapier works if you already pay for a premium Zapier plan. LeadSender is the simplest way to get every Facebook lead into Bitrix24 the moment it comes in. More in LeadSender vs Zapier.
When a Facebook lead doesn't show up in Bitrix24
- Bitrix24 shows an upgrade message: your Bitrix24 is on the free plan, which doesn't allow inbound webhooks. Start the free trial or a paid plan, then create the webhook.
- “Bitrix24 rejected this webhook link”: the webhook was deleted, its link was regenerated, or it was never saved with Create. Create a new inbound webhook and reconnect.
- “Doesn't have the CRM permission”: open the webhook in Bitrix24, add CRM (crm) under Assign permissions, save, and try again.
- Only “The webhook's user” under Responsible: the webhook is missing the Users permission. Add Users (user) to it, then click Refresh fields in LeadSender.
- “Access denied”: the user who created the webhook can't add leads or deals. Create the webhook as an administrator.
- Nothing at all: check the integration is turned on, then send a test lead and read the result. Every attempt is listed in Run history.
Open the webhook in Bitrix24 and click Generate new. The old link stops working straight away. Then click Change account in LeadSender and paste the new one.
Comparing options? See how Facebook lead ads integration works, with the 5 ways to send leads to Email, SMS or your CRM compared.